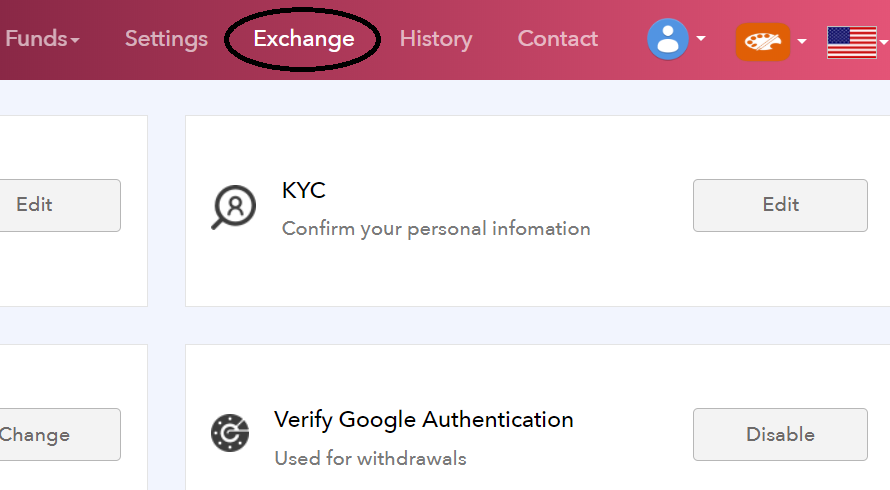
On crypto currency exchange, you can buy & sell coins. Let’s see how to do on Exchange SGP in the following sections! 1. Login tp Exchange SGP, and click “Exchange” on upper right on screen. 2. Like (1) below, click coin you want to exchange. Let’s select XRP/RIA here, as an example. *If you want to adjust the dieplay time range, click (2) below. 3. Scroll down, and you can reach to buy & sell screen. You can also check your wallet balance to see the amount of your coins on the left on screen. OK, let’s devide into two parts: buy coin, and sell coin! table of contents 1. buy a coin (put a buy order) 2. To cancel the buy order 3. sell the coin (sell put the order) 4. sell to cancel the order Buy Coin (Buying Order) 1. Enter “Price” & “Amount”, then click “BUY XRP”. *”FEE” will be charged […]
In this page, let’s see how to withdraw (transfer) your coin from Exchange SGP, and also how to cancel it. Withdraw Coin 1. Click “Funds” and “Withdraws”. 2. Click “Manage Address”. The address book will open at this time, and you’ll no longer need to enter wallet address at next time. 3. Fill in the following items and click “Add”. – Label : Your memo – Address : Receiver’s wallet address. Copy & paste is recommended. – Google authenticator : 6 digit code of two-step authentication 4. Click the checkbox (red circled below) next to the resisterd address. 5. Fill in the following items and click “Submit”. – Manage Address : Receiver’s wallet address (you just done at the previous step) – Memo Tag : No need unless the receiver requested – Amount : Amount of coin you want to transfer. For example, minimum 1,000 coins are required for RIA […]
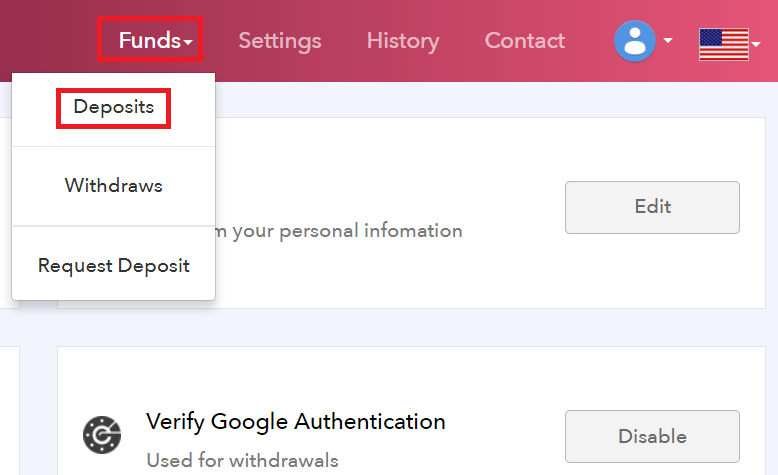
In this page, let’s learn how to deposite coins into your wallet at Exchange SPG. In other words, this is how to receive coin from someone. This how-to is almost same when you ask your family/friends to transfer their money to your bank. While you just tell them your bank information, the wallet address for crypto currency is too long to remenber. This is why you should copy & paste to the sender. OK, let’s see how to deposite coins. 1. Click “Funds” and “Deposits”. 2. At the following page, enter the required items and wait until the sender will make transaction. (1) Select the coin you’d like to receive (2) Deposite Address : Copy & Paste your receiving wallet address (3) Memo tag : Leave additional info to identify you 3. The following picture is a screen of sender (Green Box Wallet as an example). You need to ask […]
If your coins are deposited or withdrawed while you’re not logging in, your coins may be stolen with an unautorized access. In this case, you need to find out as soon as possible and solve these problem. Here, Exchange SGP allows you a auto-notification whenever you (or someone) login to your account, or deposite your coin. The steps for setting is actually simple. Let’s setup this notification for your security! 1. Click “Mail notification” and “Setting” on the top screen. 2. Click the following two sliders. (1) Login Notification : You will receive notification whenever you (or someone) login to your account. (2) Deposit Notification : You will receive notification whenever you (or someone) deposite your coin. OK, that’s sall about “Setup Email Notification”. It’s very simple! * After you secceed this setting, the following message will be sent to your email address.
In most cases, the users cannot withdraw coins at exchange if they haven’t authenticated their ID. This is to prevent a money laundering and also money goes to ant-social groups and individuals, or someone unknown. This rule also applies to Exchange SGP. Let’s complete your ID authentication, and exchange your coins safely! There are 3 authentication steps at Exchange SGP. You already completed one of these with email, when you resistered, so let’s try other two. OK, let’s learn in order! Two-Step Authentication Unless you complete two-step authentication, you cannot withdraw your coins. This is one of the most important settings for your security, so please make sure to complete this step. 1. Click “Verify Google Authentication” and “Enable”. 2. At the following screen, several steps will be required. (1) Scan QR code by the app on your smartphone. (2) Copy 16-digit code and keep it with extra attention. This […]
1. Accsess to website of Exchange SGP : https://exchange-sgp.com/ 2. Click “Sign Up”. 3. Enter each items and click “Create account”. (1) Email : Your email address (2) Password : Password must be 6 or more characters, and contain at least one uppercase letter, one lowercase letter and a number. (3) Password Confirmation : Enter the same password 4. The email will be sent to your resisterd address. Click the link of “http~”. 5. The page will move on to “Account activated successfully”. OK, that’s how to open your account at Exchange SGP. At thie stage, your account level is considered “1” that you can deposite & withdraw coins. For more advanced functions, let’s verify yourself to Exchange SGP. For the next settings : here.
If you want to check the coin price, or exchange coins at your smartphone, let’s install KEX app! It’d be much easier if you can use KEX Exchange at whenever / wherever you like! Install KEX app 1. Tap this link on your smartphone : https://www.kex.cm/dowload/ios.html 2. Tap the icon of apple and “Install”. 3. Once you install the app, the icon will appear on the screen of your smartphone. Tap the icon, and if the following message comes up, tap “Cancel”. 4. Tap “Settings”. Select “General” and “Profiles” 5. Tap “ABSERVETECH PRIVATE LIMITED”. 6. Tap the icon of KEX, and tap “Trust”. 7. When the following message appears, tap the icon of KEX again. 8. Tap “Allow”, and you can receive notifications from KEX app. * The Chinese characters at the following page means “Skip”. Tap this as well. 9. Finaly, KEX app […]
On KEX exchange, you can buy & sell your coins at “market order” and at “limit order”. Let’s grab a brief definition of these words first. (1) Limit Order Limit orders allow you to set a maximum purchase price for your buy order, or a minimum sale price for your sell orders. If the market doesn’t reach your limit price, your order will not be executed. Good for those who are not in a hurry, and those who want a good deal. (2) Market Order Market orders will go into market to execute at the best available price. Good for those who want an immediate deal. OK, let’s see how to buy & sell your coins! 1. Login to KEX Exchange and click “Exchange”. 2. Select the coin you want to exchange, from the coin list on the left (let’s take RIA here as an example). 3. Scrolol down to […]
Just like a bank, you can deposite & withdraw your crypto currency on KEX Exchenge. So, Let’s learn how here. 1. Login KEX Exchange and click “Assets” on upper right. 2. At this page, you can see how much / what kind of coins you have in your account. Then, let’s learn in order (1) Deposite to (2) Withdraw with an example for RIA coin. table of contents 1. coin of payment procedure 2. remittance procedure of the coin Deposite Your Coin First of all, you need to let know your receiving address (deposite address) to the sender. 1. Click “Deposite” for the coin you want to receive. Copy your “Deposite Address” and send it to the sender. * For RIA coin, UID (6 digit code) is also needed. Cope & send this code to the sender as well. OK, then you’ll just wait until the sender will deposite coin to you! […]
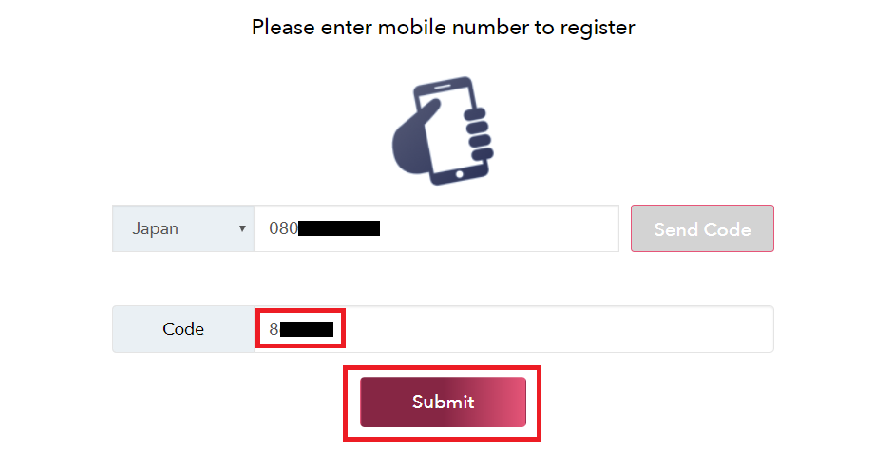
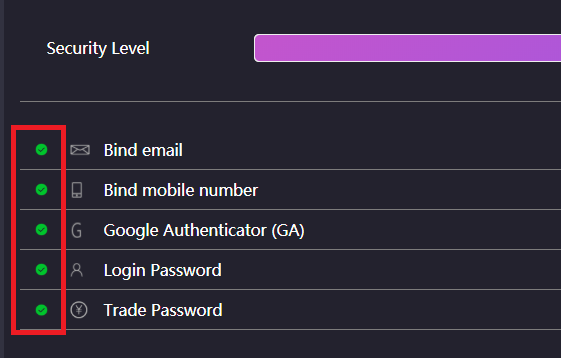
Once you open your account, let’s setup security setting. Even though it takes a little time, this step will work not only for security, but also for buy & sell your coin on exchange. OK, let’s learn how to setup! 1. Login to KEX Exchenge, and place the cursor over your email address, and select “Security Setting” 2. At this screen, you can see your user ID (UID). 3. Click “Bind” on “Bind mobile number”, and enter your phone number. After you click “Send”, SMS will be sent to your smartphone. 4. Enter SMS code and click “Submit”. 5. If the color of checkmark on the left will change from red into green, you succeed to bind mobile number. Then, let’s move onto two-step authentication by clicking “Bind” at “Google Authenticator (GA)”. 6. You can setup Google Authenticator in order; (1) Open the app and scan QR code of “Bind […]


